
Campaign Settings
Campaign Structure
A campaign consists of two main parts:
-
Main campaign settings — general parameters (name, domain, source, white page, etc.)
-
Stream sets — sets of filters and flows for traffic routing
Section 1: Main Campaign Settings
1.1 General Information
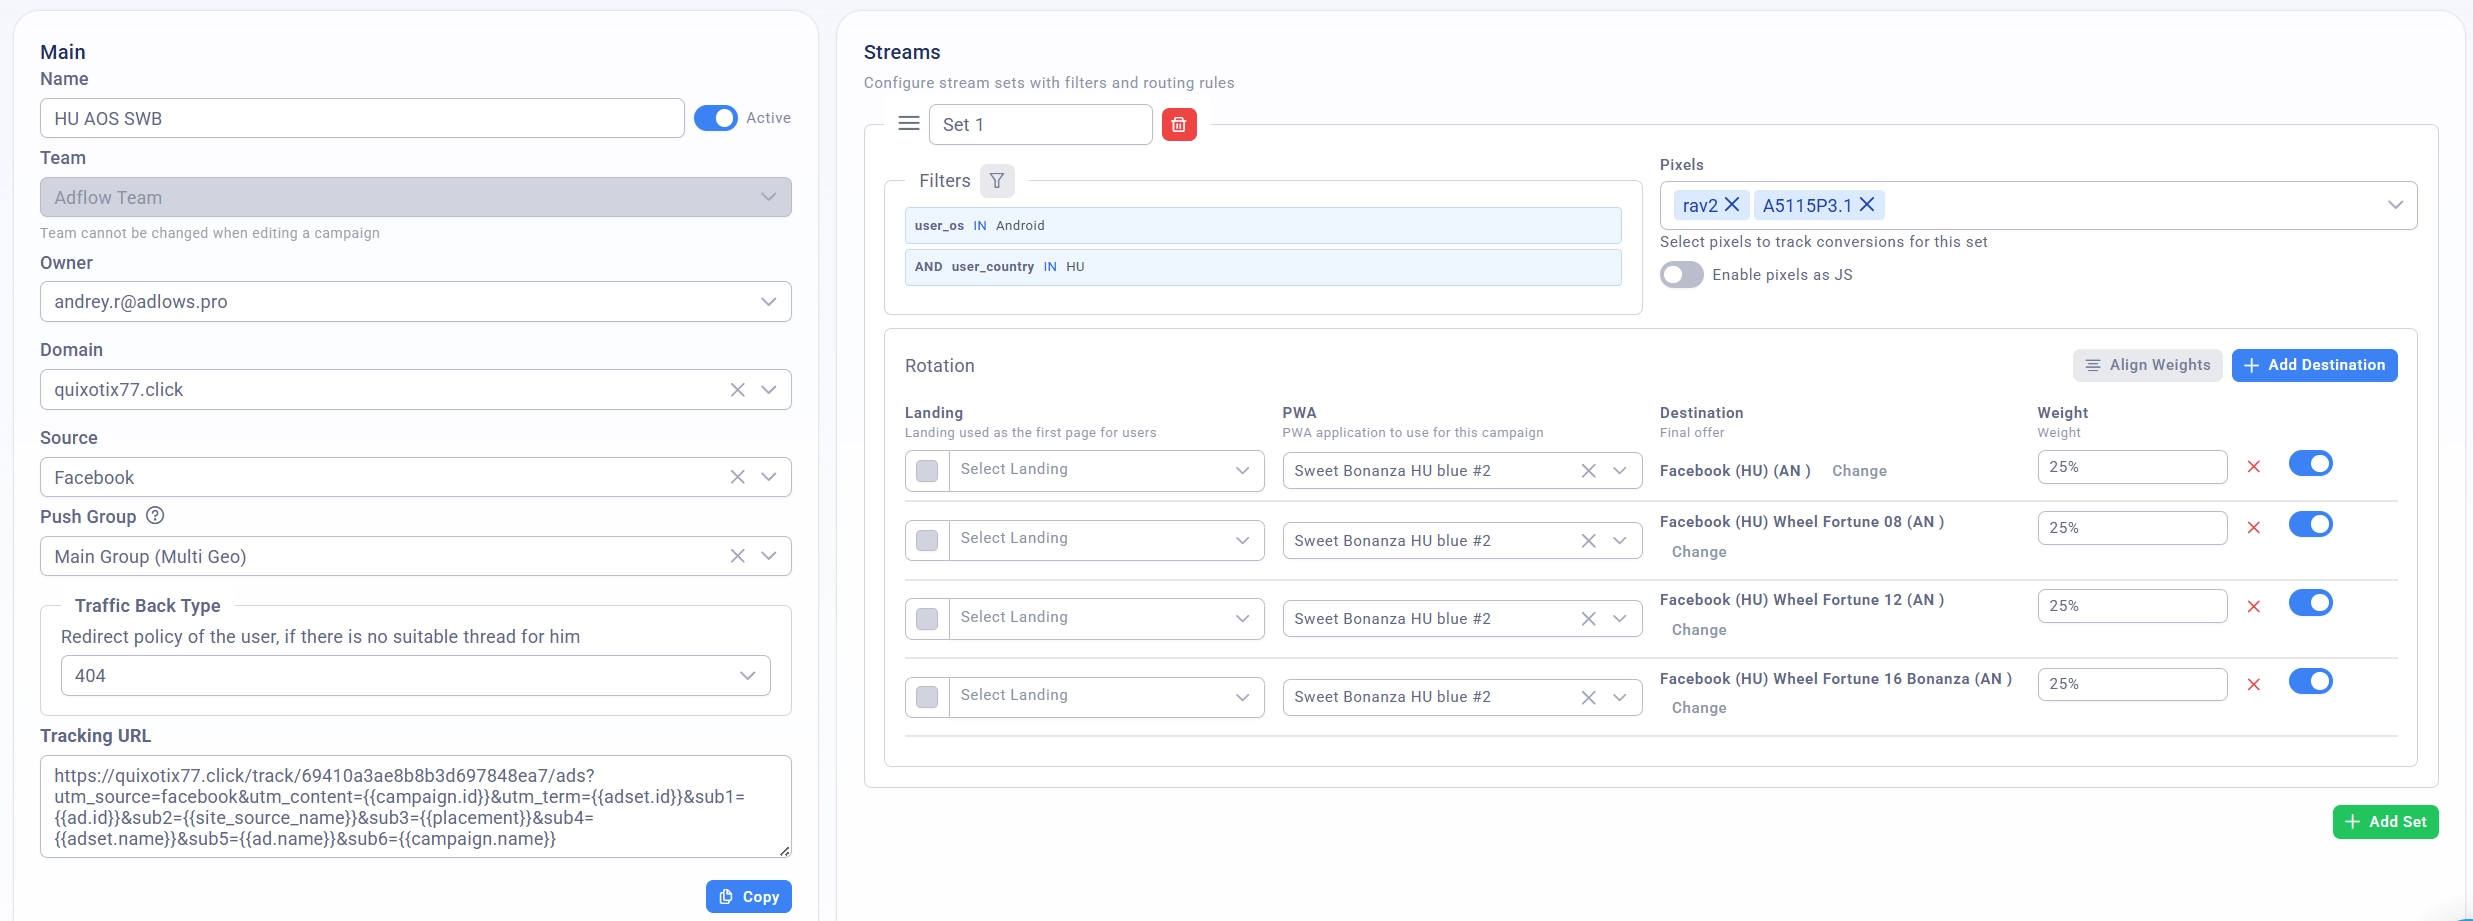
In this section, you set the basic parameters of the campaign:
Name and Status
-
Campaign Name — a unique name for identifying the campaign (minimum 2 characters)
-
Active/Inactive — toggle for the campaign's activity. Inactive campaigns do not accept traffic

Owner (for team leads)
- Owner — the owner of the campaign from the team

1.2 Domain and Source
Domain
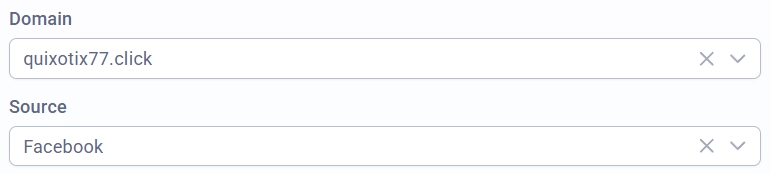
Select the domain through which the traffic will flow. The domain must be previously added to the system.
Traffic Source
Select the source (Source) that will be used to track clicks. Sources contain parameters to be passed to the tracking link (for example, parameters for UTM tags or ad network macros).
Conversion and Payout Share for Source
If the selected traffic source has a linked pixel (postback of the source), two additional settings appear under the source selection. They control what portion of conversions and payouts is sent to the traffic source pixel, and do not affect the pixels linked to stream sets (Set), as well as the pixels passed through the query parameter ?pixel=. Next to the name of each setting, there is a “?” sign with a tooltip.
Setting | Range | Default | What it does |
|---|---|---|---|
Conversion share for source | 0–100% | 100% | What percentage of conversions will be sent to the source pixel. For each conversion, a number from 0–100 is drawn; if it exceeds the specified threshold, the postback is not sent and is marked with the status Ignored in the pixel logs. At 100%, all conversions are sent, at 0% — none. |
Payout share for source | 0–300% | 100% | The scaling factor for the payout (revenue) going to the source pixel: sent |
Both settings are visible only if there is a pixel at the source. Postbacks with the status Ignored can be viewed on the Pixel Logs page (filter by status “Ignored”), and in the Initiator column, such calls are marked with the value Source.
1.3 Push Group (optional)
You can link a push group to the campaign to send push notifications to users.
1.4 Traffic Pricing Settings
This setting allows you to set the method of calculating the cost of incoming traffic (cost parameter).
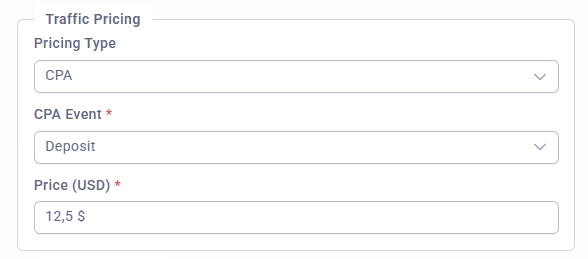
Pricing Types
Type | Description |
|---|---|
CPC | Cost Per Click — payment per click (default) |
CPM | Cost Per Mille — payment per 1000 impressions (cost divided by 1000) |
CPA | Cost Per Action — payment upon a specific event |
CPA Setting
When selecting the CPA pricing type, two additional mandatory fields appear:
1. CPA Event (mandatory)
Value | Description |
|---|---|
Registration | Payment upon user registration (Hold event) |
Deposit | Payment upon user deposit (Accept event) |
2. Price (USD) (mandatory)
-
Enter the amount in US dollars
-
Supports up to 2 decimal places
-
Minimum value: 0
Validation Rules
-
When selecting the CPA type, both fields Event and Price must be filled in
-
An error message will appear if you try to save without filling in these fields
-
Mandatory fields are marked with a red asterisk (*)
Example of Use
-
Select CPA from the pricing type dropdown
-
Select Deposit as the CPA event
-
Enter 2.50 in the price field
-
Save the campaign
This configuration will charge $2.50 USD for each deposit associated with this campaign.
1.5 Redirect Policy (White Page)
Setting the behavior for users who do not fit any filter in the stream sets.
Three options are available:
404 (NONE)
The user receives a 404 error.
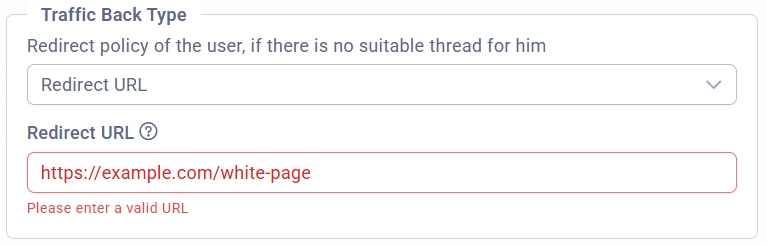
URL Redirect
Redirect to an external URL. Enter the full URL (for example, https://example.com/white-page).
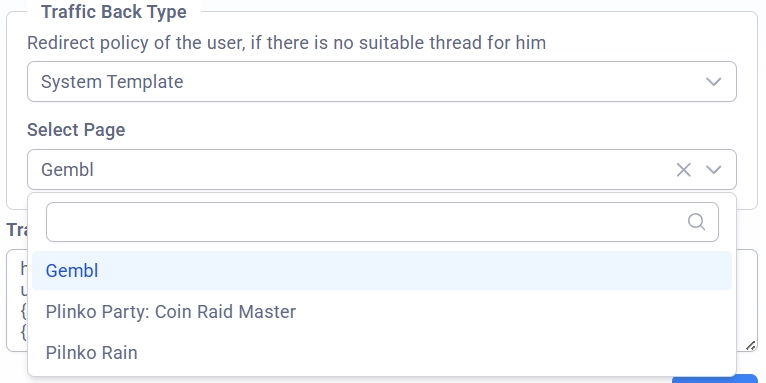
System Template (SYSTEM)
Select a ready-made white page template from the system.
Currently, there are 2 types of system landings:
-
Gebml (for slots)
-
Plinko (for crash games)
1.6 Tracking Link
After setting the domain, source, and saving the campaign, a tracking link is automatically generated.
Link format:
https://{domain}/track/{campaignId}/ads?{source_params}
Source parameters (source_params) are automatically added from the settings of the selected source. Macros (for example, {{tid}}, [TID], $!{tid}) are preserved without encoding for proper operation with advertising platforms.
1.7 Additional Parameters
Back Button URL
URL for the "Back" button in the PWA or landing page. Users will be sent to this URL when they press the "back" button in the browser.
Disable tracking for WhiteList traffic
An option to disable tracking for users redirected to the white page.
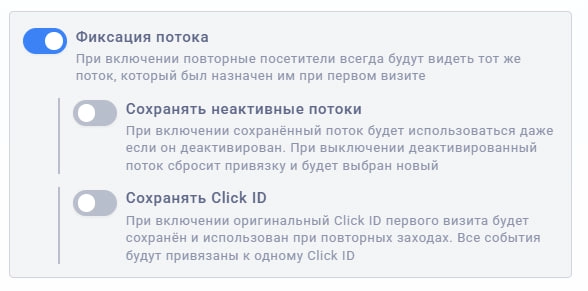
Sticky Flow
Sticky Flow is a mechanism for pinning a user to a specific flow. On the first visit, the user is assigned a flow through the standard filter and rotation logic. On all subsequent visits, they are automatically directed to the same flow without going through the filters and the rotation draw again.
How It Works
-
The user follows the tracking link for the first time
-
The system goes through the standard cycle: stream set filters → set selection → flow rotation by weight
-
The result (set ID and flow ID) is saved in the user's browser
-
On a repeat visit, the system finds the cookie, checks that the set and flow still exist, and immediately directs the user without filters or a draw
-
If the set or flow has been deleted from the campaign — the cookie is reset and standard routing is performed
Enabling Sticky Flow
Switch Sticky Flow to the "On" position. A hint is displayed under the setting name:
When enabled, repeat visitors will always see the same flow that was assigned to them on their first visit
After enabling the main toggle, two additional nested settings will appear.
Keep Inactive Flows
Controls the behavior when restoring a binding to a deactivated flow.
-
Disabled (default) — if the flow has been deactivated, the binding is reset and standard routing is performed. The user will receive a new flow
-
Enabled — the deactivated flow continues to be used for bound users. Useful if you temporarily disable a flow for new users but do not want to disrupt routing for existing ones
When enabled, the saved flow will be used even if it is deactivated. When disabled, a deactivated flow will reset the binding and a new one will be selected
Keep Click ID
Controls whether the click identifier is preserved between visits.
By default, a new clickId is generated on each visit. When this setting is enabled:
-
Disabled (default) — each visit receives a unique
clickId -
Enabled — the
clickIdof the first visit is saved and restored on repeat visits. All user events are tied to the sameclickId
When enabled, the original Click ID of the first visit will be saved and used on repeat visits. All events will be tied to a single Click ID
This is useful for:
-
Combining all of a user's visits into a single chain of events
-
Correct attribution of conversions when the user returns and performs the target action later
-
Analytics where all actions need to be tied to the first click
Section 2: Stream Sets
2.1 What Is a Stream Set?
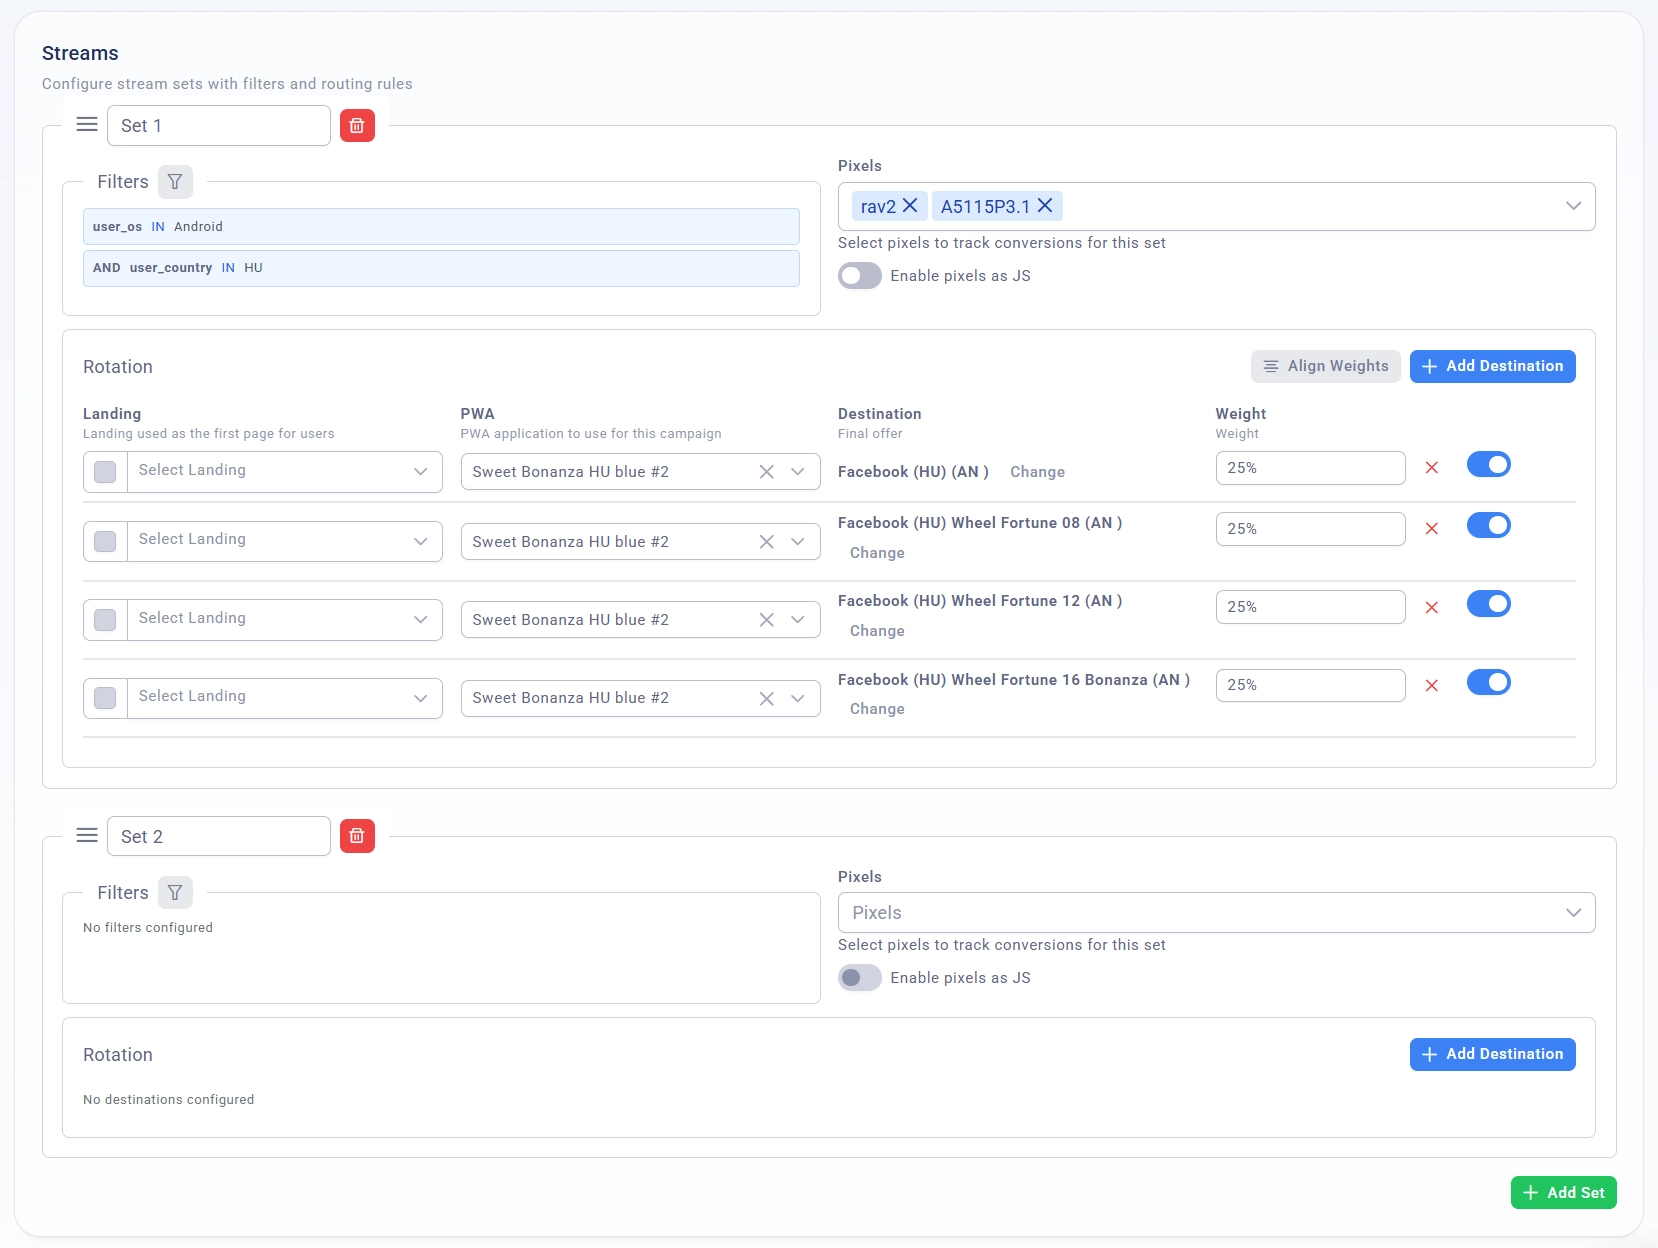
A stream set is a traffic interceptor that works based on filters. Stream sets are processed sequentially from top to bottom.
How it works:
-
The user follows the tracking link
-
The system checks the filters of the first stream set
-
If the user meets the filter conditions → they are directed to one of the flows inside this set
-
If they do not meet them → the system moves on to check the next stream set
-
If no set matches → the user lands on the White Page
2.2 Creating a Stream Set
Click the "Add Set" button to create a new stream set.
Each stream set contains:
-
Name — for easy identification
-
Filters — conditions for intercepting traffic
-
Pixels — tracking codes (Facebook Pixel, TikTok Pixel, etc.)
-
Rotation — a list of flows with weight distribution
Managing Stream Sets
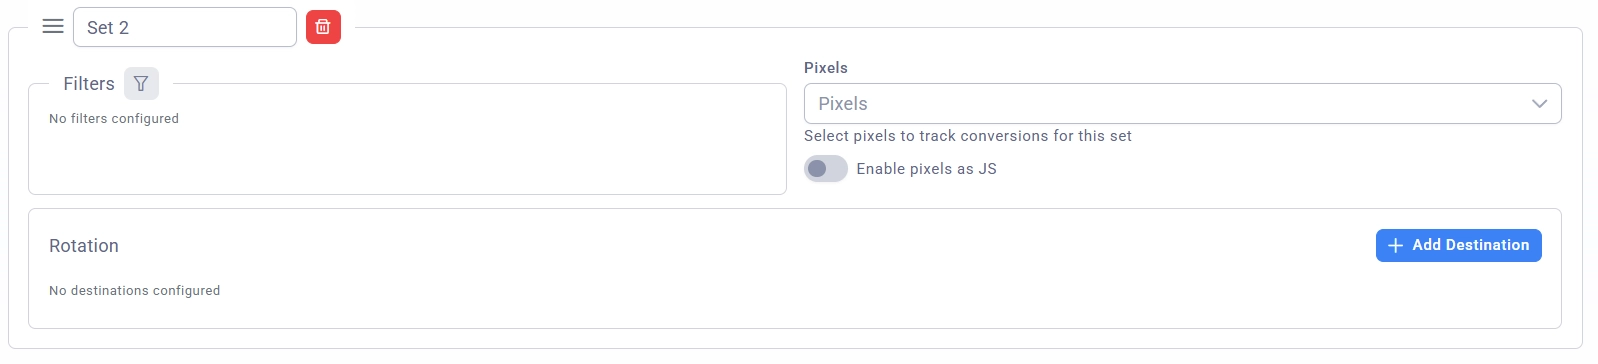
-
Drag and drop — use the three-bar icon to change the order of the sets (stream sets are processed from top to bottom)
-
Deletion — the button with the trash icon
2.3 Setting Up Filters
Click the button with the filter icon next to the "Filters" heading to open the filter editor.
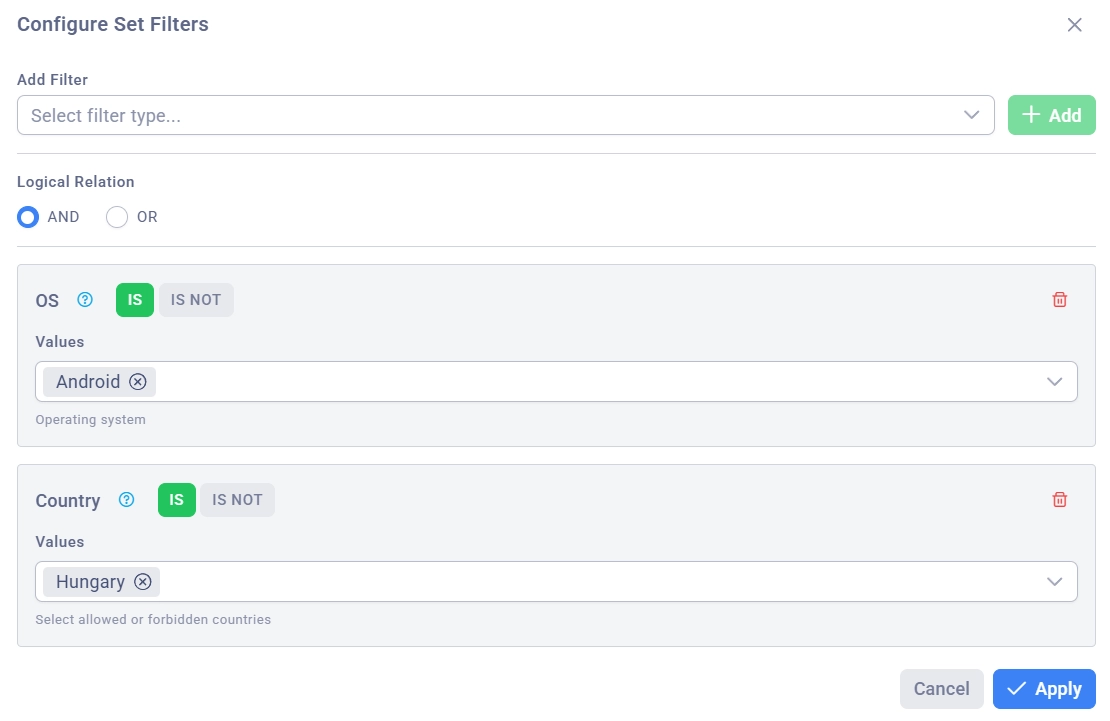
Filter Application Modes
-
AND — the user must meet all filters simultaneously
-
OR — the user must meet at least one filter
Adding a Filter
-
Select the filter type from the list (filters are grouped by category):
-
Parameters — URL parameters (UTM tags, custom parameters)
-
Geo — geographic data (country, language, city, region, provider)
-
Device/Browser — device, OS, browser
-
Tracking — tracking data (Connection Type, IP, User Agent, etc.)
-
-
Click the "Add" button
Filter Operation Types
-
IS (IN) — the value must match one of the specified values
-
IS NOT (NOT_IN) — the value must not match any of the specified values
-
BETWEEN — the value is within a range (for numeric parameters)
-
EXISTS — the parameter exists
-
NOT EXISTS — the parameter is absent
Filter Examples
Filter by country:

-
Type: Country
-
Operation: IS
-
Values: HU, PL, ES
Filter by device type:

-
Type: Device Type
-
Operation: IS
-
Values: Mobile, Tablet
Filter by UTM tag:
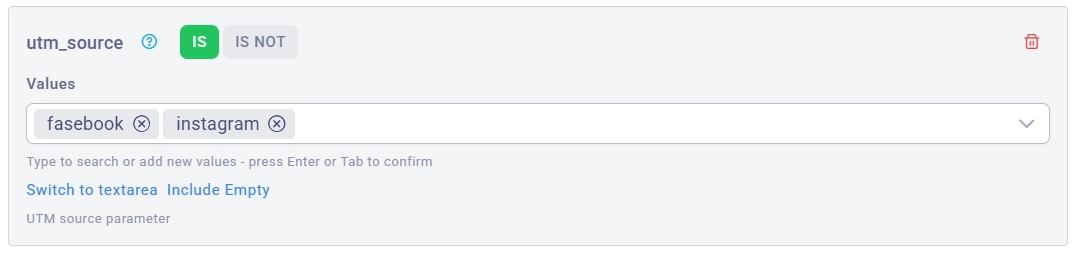
-
Type: URL Parameter
-
Key:
utm_source -
Operation: IS
-
Values: facebook, instagram
Value Input Modes
For filters with IN/NOT_IN operations, two input modes are available:
MultiSelect mode (default):
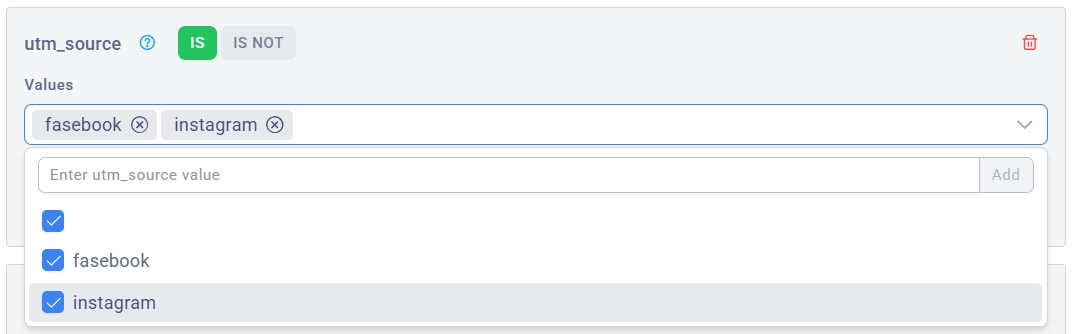
-
Enter values and press Enter
-
Remove values by clicking on the cross
TextArea mode:
-
Switch via the "Switch to Textarea" link
-
Enter values line by line (each on a new line)
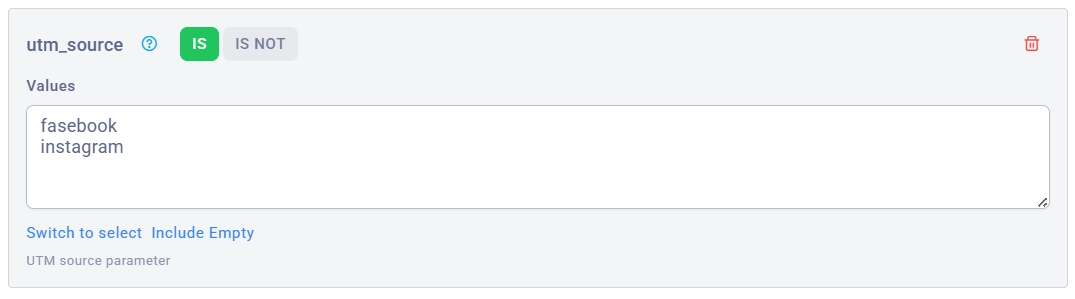
💡 Tip: Use TextArea to quickly enter a large number of values
The special value @empty
For URL Parameter filters, you can add the special value @empty, which means "the parameter is absent or empty".
⚠️ Filter Warning
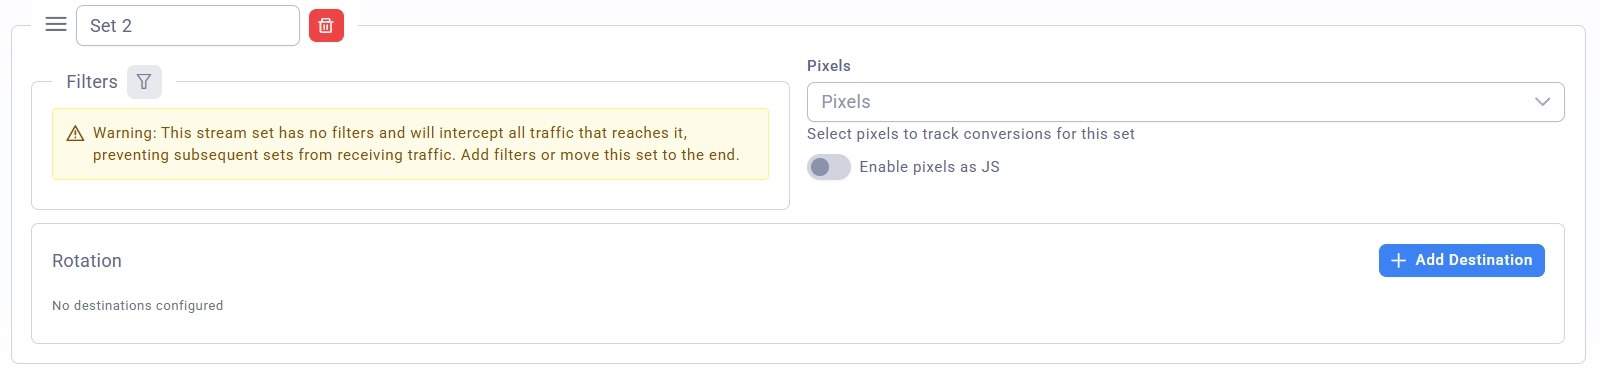
If a stream set has no filters and is not at the end of the list, it will intercept all traffic and subsequent sets will not work.
Recommendations:
-
Always add filters to stream sets
-
Or place sets without filters at the end of the list (as a catch-all)
2.4 Setting Up Pixels
Select up to 3 pixels that will respond to events associated with this stream set.
Available pixels:
-
Facebook Pixel
-
TikTok Pixel
-
GET Request
More details: pixel documentation
⚠️ Unavailable pixels: Pixels you do not have access to are displayed with the "(No access)" label and a yellow background. They were set on your campaign by a Team Lead.
2.5 Flow Rotation (Rotation)
Rotation is a list of destinations (flows) to which traffic is distributed within a stream set.
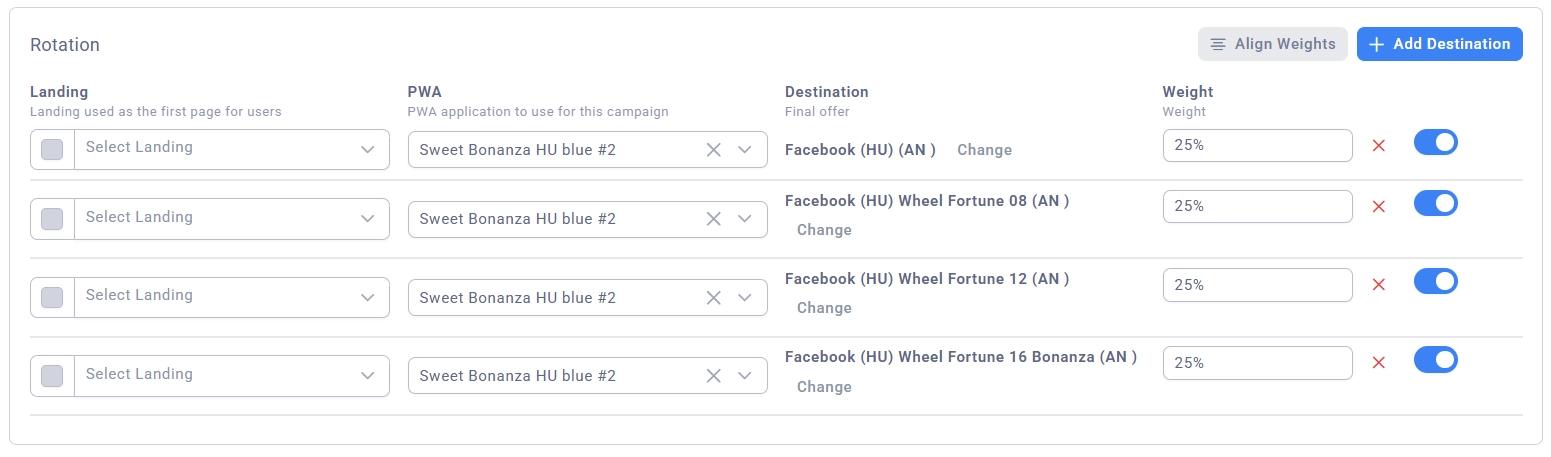
Adding Flows
-
Click the "Add Destination" button
-
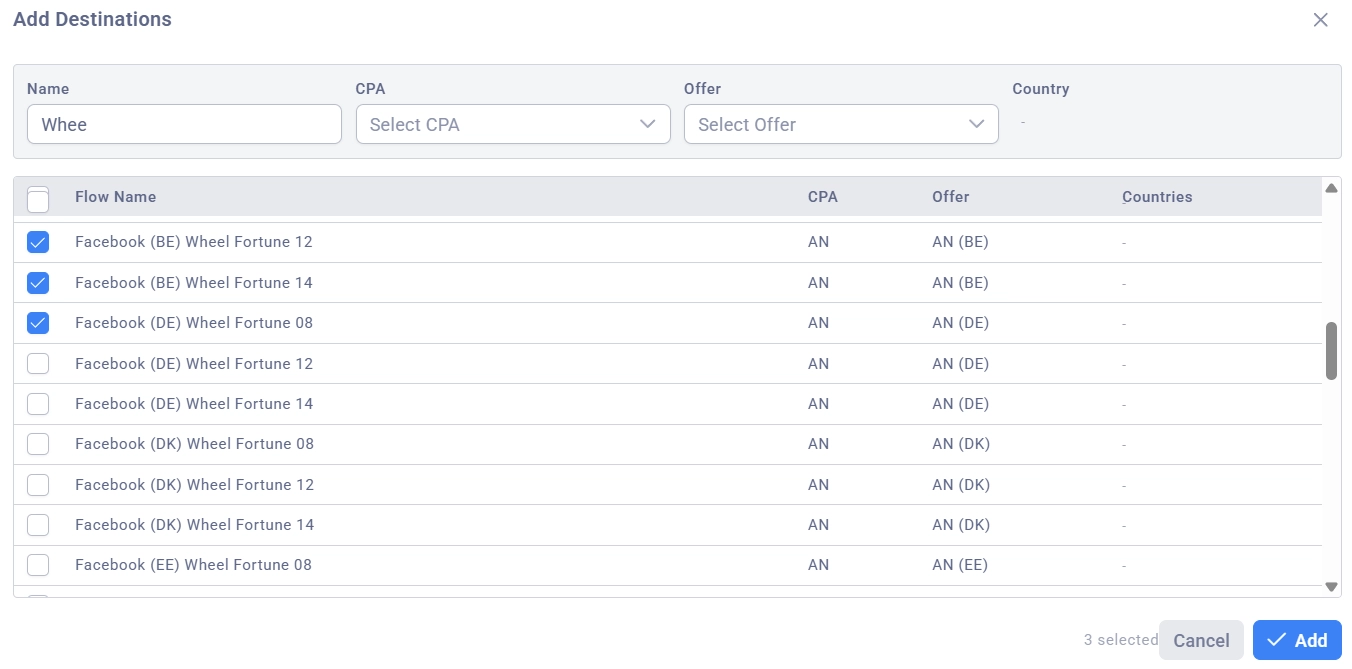
A dialog box will open with a list of available flows
-
Flow filters (at the top of the dialog):
-
Name — search by flow name
-
CPA — filter by CPA network
-
Offer — filter by offer
-
Country — filter by country (in the future)
-
-
Select flows using the checkboxes
-
Click "Add"
Flow Parameters
For each added flow, the following are configured:

-
Landing — the pre-landing page for this flow
- The checkbox to the left of the field — enables the "Landing as PWA" option (when this option is enabled, the pre-landing page will offer to install the PWA)
-
PWA — Fake Store Page for installation
- The field is disabled if the "Landing as PWA" option is enabled
-
Destination — the flow name, CPA network, and offer
-
Displayed as:
FlowName (CPA Name) -
The "Change" button — switch the destination to another flow
-
-
Weight — the percentage of traffic for this flow (from 0 to 100%)
-
Active/Inactive — toggle for the flow's activity
The "Align Weights" Button
Automatically distributes the weight evenly among all flows. For example, if you have 3 flows, each will be set to a weight of 33%.
Traffic is distributed proportionally to the sum of the stream set's active weights.
If all 3 destinations have a weight of 100% each, it is equivalent to setting the weight to 33% each
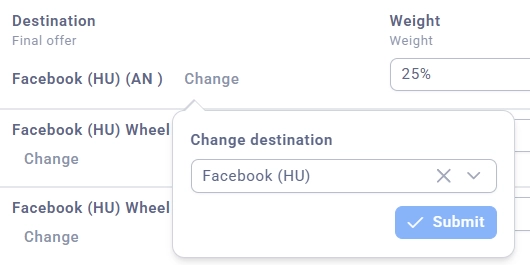
Changing a Flow's Destination
-
Click the "Change" button next to the flow
-
In the window that appears, select a new flow from the list
-
Click "Submit"
-
The system will automatically update the CPA and Offer for the new flow and save the campaign
Deleting a Flow
Click the button with the X or trash icon next to the flow.
Inactive Flow Warning
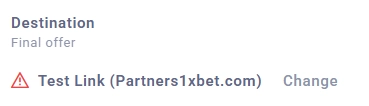
If a flow is inactive (it was deactivated on the destination management page), a warning icon is displayed next to its name. However, the inactive flow will still receive traffic.
Section 3: Saving and Managing the Campaign
3.1 Saving Changes
Click the "Save" button (the green button with a checkmark icon) in the upper right corner.
When saving:
-
A new campaign is created (if in creation mode)
-
The settings are updated (if in editing mode)
-
All stream sets with filters and flows are saved
3.2 Validation
The system checks the mandatory fields before saving:
-
Name — minimum 2 characters
-
Owner — mandatory (except for the Buyer role)
-
Domain — mandatory
-
Source — mandatory
-
White Page URL — must be a valid URL (if the URL type is selected)
Validation errors are displayed:
-
As a red border around the field
-
As error text under the field